.jpg)

In this article, we’ll be showing you how to connect and customize your calendar for your chat widget.
What does integrating your calendar do?
Why should you connect your calendar to the chat agent?
When you integrate your calendar with Small Business Chatbot, you get the ability to directly book appointments into your calendar. This is super helpful for booking things like online demos, product demonstrations, service appointments, or customer service follow-ups. It even has the ability to automatically set locations so you can show up directly to service appointments or inspections.
It’s easy to lose customers to your competitors if you don’t book them quickly. The chat widget is designed to be helpful first and then gently nurture people towards booking an appointment with you.
What calendar actions can the AI chat agent take for you?
Once you connect your calendar, the AI agent can do the following:
- Schedule appointments: directly check for times that work for both you and the person talking to the agent, and then book them directly in.
- Cancelling appointments: if email is supplied, appointments can be canceled.
- Rescheduling: the chat agent can also reschedule appointments in one flow, once confirming what needs to get cancelled and what needs to be booked.
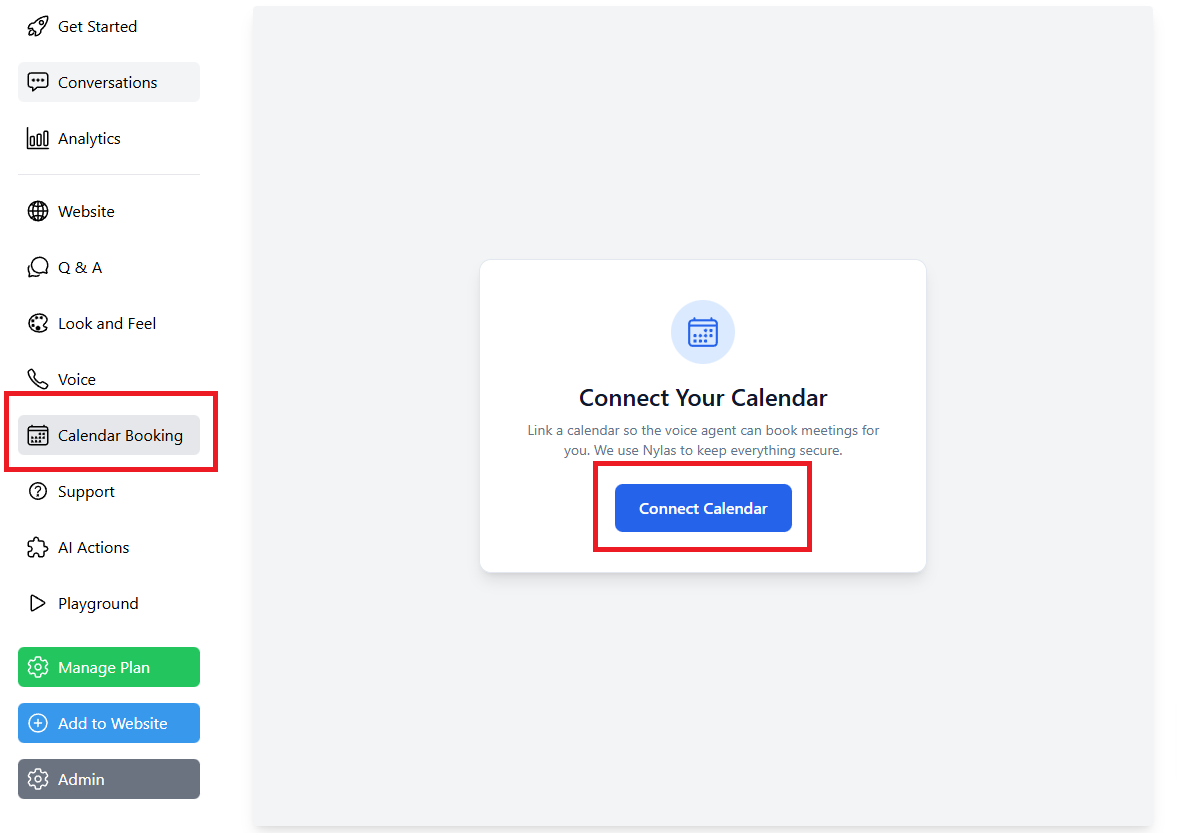
How to connect your calendar
- Log in to the platform (or sign up if you haven’t yet).
- Click on “Calendar booking”.
- Click “Connect Calendar”.
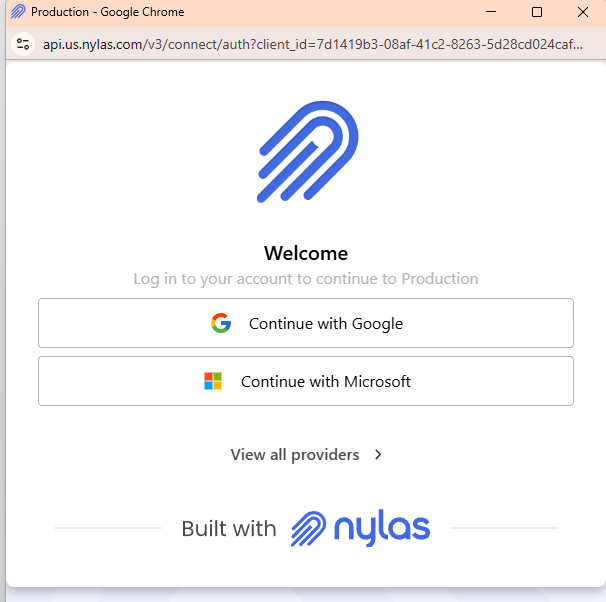
- Click “Continue with Google” or “Continue with Microsoft”. If you use iCloud, click “view all providers”.
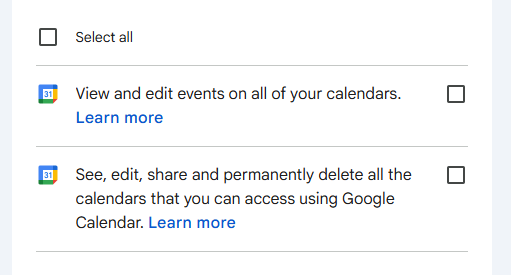
- Click continue until you get to the permission screen. Click “select all” to give permissions so that calendars can be edited.
Customizing your calendar options
Once you’ve connected your calendar, click “turn on calendar booking for the chat agent” to activate it.
Booking requirements
Then set your booking requirements. These tell the chat agent which things are absolutely required by the agent in order to book an appointment. Most of the time, you for sure want to set the email as required so prospects get a follow-up.
Click “require location” if your goal is to book service appointments at a location, like scheduling a repair, or a roofing inspection, or a landscaping visit.
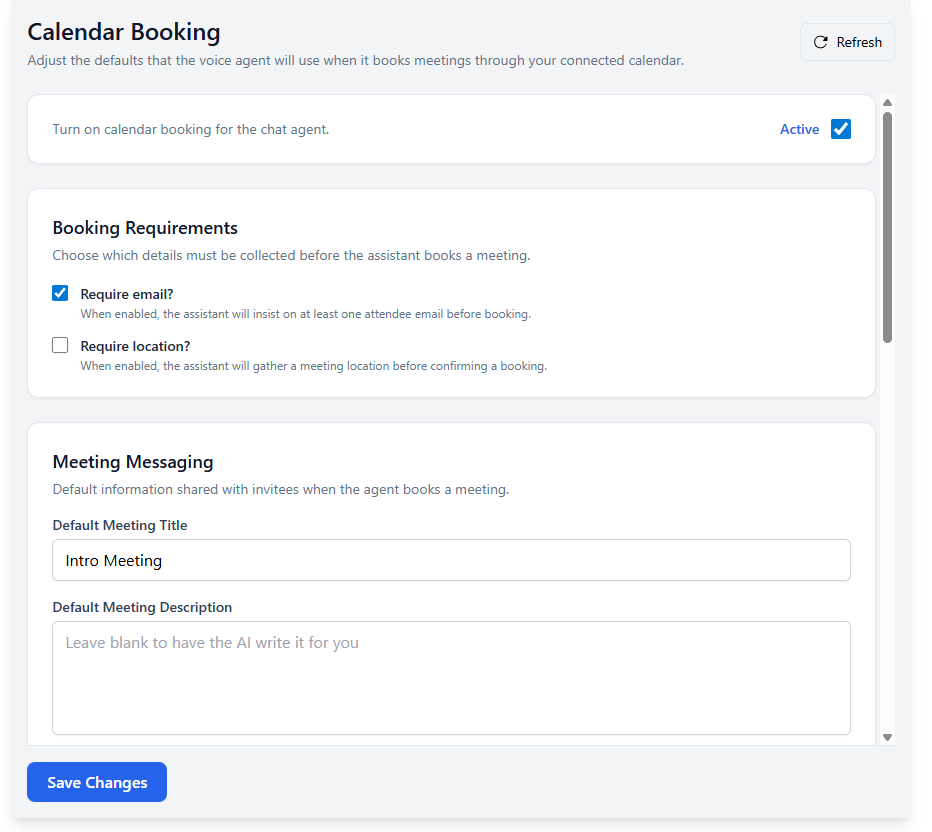
Meeting Messaging
- Default meeting title
- This gives you the exact title of the meeting. For example, if you put “Painting or drywall estimate on-site” it will always show that. If you leave it blank, the AI agent will write the title for you based on the conversation. So if you have a variety of different types of appointments, it’s probably best to leave it blank.
- Default meeting description
- This is the information that shows up in the calendar description. If you leave it blank, the AI will decide what to add.
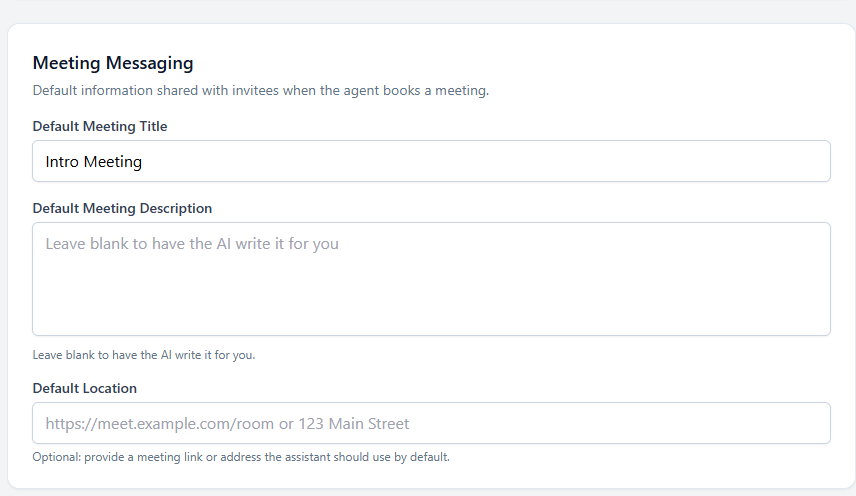
- Default location
- You can put either a link to a video conference or a location. For Zoom links, use a personal conference link, same with Google Meets. Select a location if the user is coming to you (for example: a barbershop where clients come to your shop). If you leave it blank, the AI can decide what location to select based on the conversation.
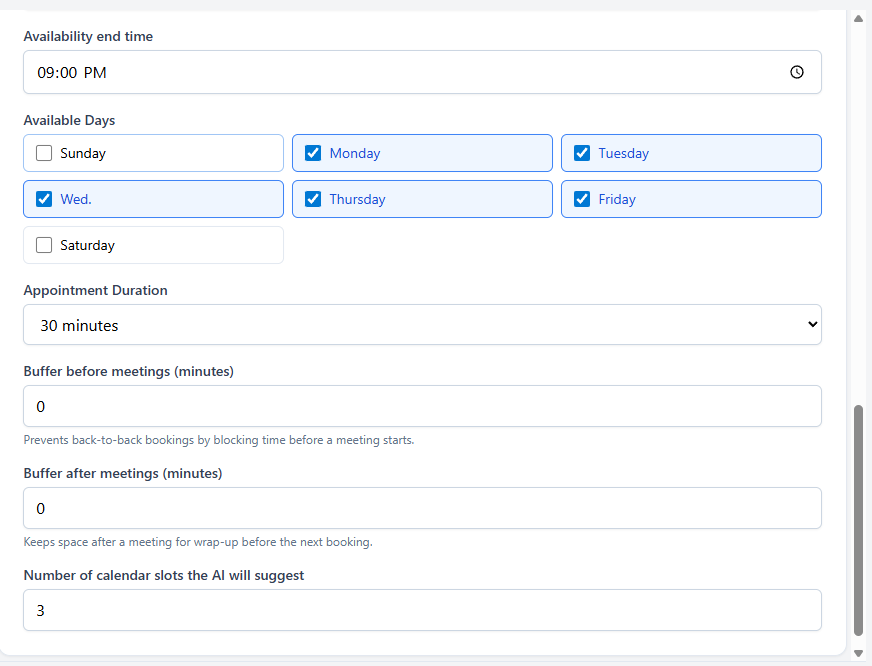
Availability
This section tells the agent what times are okay for it to book you in, and how many slots to show the user.
- Timezone
- Select your timezone for availability. This also impacts how the agent displays its responses. For example, if you select America/Toronto, it will display the results in EST (e.g., “confirming your availability for 4pm EST”). This keeps everyone on the same page—especially if someone is conversing with you outside of your timezone.
- Availability start and end time
- The times inside where the agent is okay to book. If you select 9am as your start time, then it will never book you in for anywhere before 9am. If you select 6pm for your end time, then no time after 6pm in your timezone will ever be selected.
- Available days
- Only select the days you are okay with booking. If not selected, the agent will not show availability or book you in for those times.
- Appointment duration
- Defines how long your appointment will be once it’s booked into the calendar.
- Buffer before and after the meeting
- This describes how much time before or after any other calendar meeting is needed to book. For example: if you have an appointment at 2pm and your buffers are 30 minutes before and after, the AI agent will only book before 1:30pm and after 2:30pm.
- Number of calendar slots the AI will suggest
- When checking availability, this option tells the agent how many slots it can return. So if you select 3, it will tell the user a maximum of 3 different available slots at a time.